Windy City Victorian
Our story of restoration and renovation in the city of Chicago
Saturday, March 28, 2015
Wednesday, March 25, 2015
Playing with Mud
This part seems to be moving along quickly now, thankfully! Immediately after getting drywall up, the guys started taping, the process of spreading mud over the seams and screws so everything is smooth. This is seriously an art because anytime I've ever patched something I never get it as smooth as it should be. Plus these guys are so good that they hardly need to sand it after. They pretty much put it on so smooth to begin with that there isn't much to sand whereas I'm over here sanding for days. Here are some photos of various rooms.
Sunday, March 22, 2015
Thursday, March 19, 2015
Tuckpointing and Waterproofing
We weren't initially going to waterproof the back side of the house in this phase, however, we decided it made sense to do it now rather then later. Here's a glance at the dimple board used for waterproofing. To save some money we decided we will only waterproof around the back half of the house and when we build a new front porch we will do the other front half.
South side of the house by the electrical meter
North side of the house
West side of the home under the mudroom
West side of the house with the drain tile installed
Tuesday, March 17, 2015
Nice and Toasty!
One of the big things we had to discuss was insulating this house. You may have noticed, that there are NUMEROUS large windows, making sure it was insulated properly was a top priority. Back during the first winter we lived here, before we started any major renovations, it would get down to around 30 degrees in our kitchen and Lauren would cook with a coat on. We even had a pipe burst one time and water was spraying all over because it was so cold on the first floor. Of course, anything we did would be an improvement from that, but I think we were extra sensitive to this issue and wanted to make sure we kept the house warm!
Since the entire first floor was gutted and all walls were open, we went the route of spray foam. For anyone not familiar, spray foam is an alternative to traditional building insulation such as fiberglass. Spray foam insulation, like other insulation, saves on energy costs and lowers utility bills. Studies by the US Department of Energy show that 40% of a home's energy is lost as the result of air infiltration through walls, windows and doorways. Buildings treated with spray foam insulation insulate as much as 50% better than traditional insulation products. Other benefits of spray foam are that it acts as a moisture barrier, it deters mold, has a long life span and is eco-friendly.
Spray foam comes in two forms, open cell and closed cell. The difference between the two is density. The higher the density, means a higher R-value, which means the more effective the insulation properties. Closed cell has a higher r-value, therefore it's more efficient, but it comes with a big price tag. We figured we should do it right and get the closed cell. Go big, or go home right? It's of course super depressing when you total up renovation costs and 75% of the costs are BEHIND the walls which no one would see :(
Saturday, March 14, 2015
Basement - Plumbing
As much as we would have loved to keep the renovations the 1st and 2nd floor only, there was quite a bit that needed to be addressed in the basement. Because we were installing a drain tile on the outside of the house we wanted to make sure we installed a sump pump as well as a new drain on the basement walkout. Both drain tile and walkout drain will flow into the sump pump.
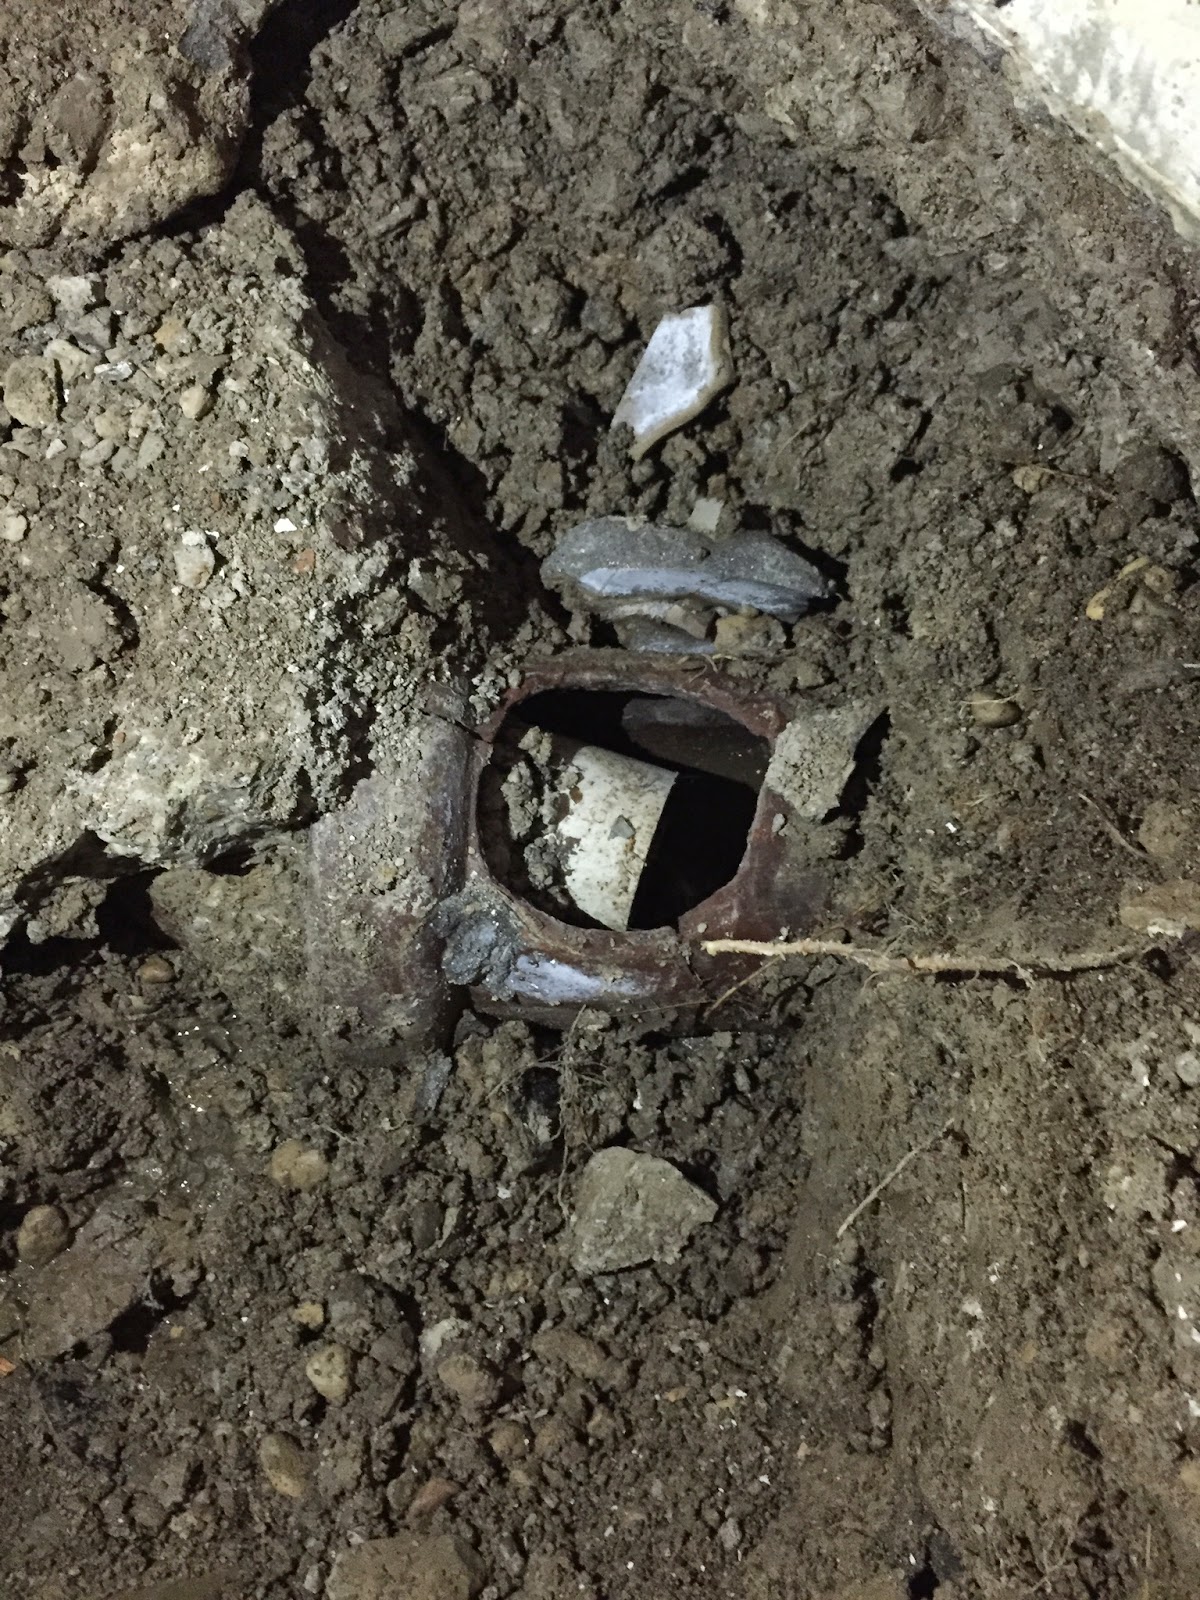
This was the main thing that we did not pass on the plumbing inspection. This is what the previous owners thought was a good fix. This is the main drain that leaves the house and enters the clay city plumbing. What they did was run PVC into the clay pipe and in order to have the pvc stay within the clay pipe they POURED CEMENT into the clay pipe. Not cool.
Monday, March 9, 2015
Fireplaces and Chimney
After going back and forth with Lindemann Chimney Supply for a few weeks, they gave us an estimate of 16K-50k (yes, you read that right, they gave us a $34,000 range). We told them they were nuts considering you can install a brand new chimney for a fraction of that cost. We decided to get a bid from Hearth and Home. We worked directly with the owner Pat, and he was extremely helpful and knowledgeable. It was ultimately too much money to install wood burning, so we had to go the route of gas. Lauren was upset about not being able to have wood burning, but I think it's actually a blessing in disguise.
Both chimney boxes had to be rebuilt and lintel was added.
Original chimney that was 2 ft higher the the turret in order to meet code (needed for wood burning fireplaces). Now that we are going to route of gas fireplaces, the chimney can be significantly shorter which lowers the cost of rebuilding. Cost to rebuild at lower height is approximately $6,000.
Chimney brought down in size for a gas fireplace
New chimney capped and ready to go. I'm happy we went this route because the massive chimney was a bit of an eye sore. Most people don't have the issue with the massive chimney, but because our roof is so pitched, it looked ridiculous at that height.
Sunday, March 8, 2015
Hardwood Floors Are Here!
THE NEW HARDWOOD FLOORS HAVE BEEN DELIVERED!!!!! 2300 SQ Ft of white oak. We were pretty upset that the original floors were in such bad shape and we couldn't salvage them, but having new floors will be nice. In an effort to add back some character, we decided to use a combination of 3 inch, 4 inch and 5 inch planks.
We'll alternate between the various sized planks like this.
Saturday, March 7, 2015
New Doors!
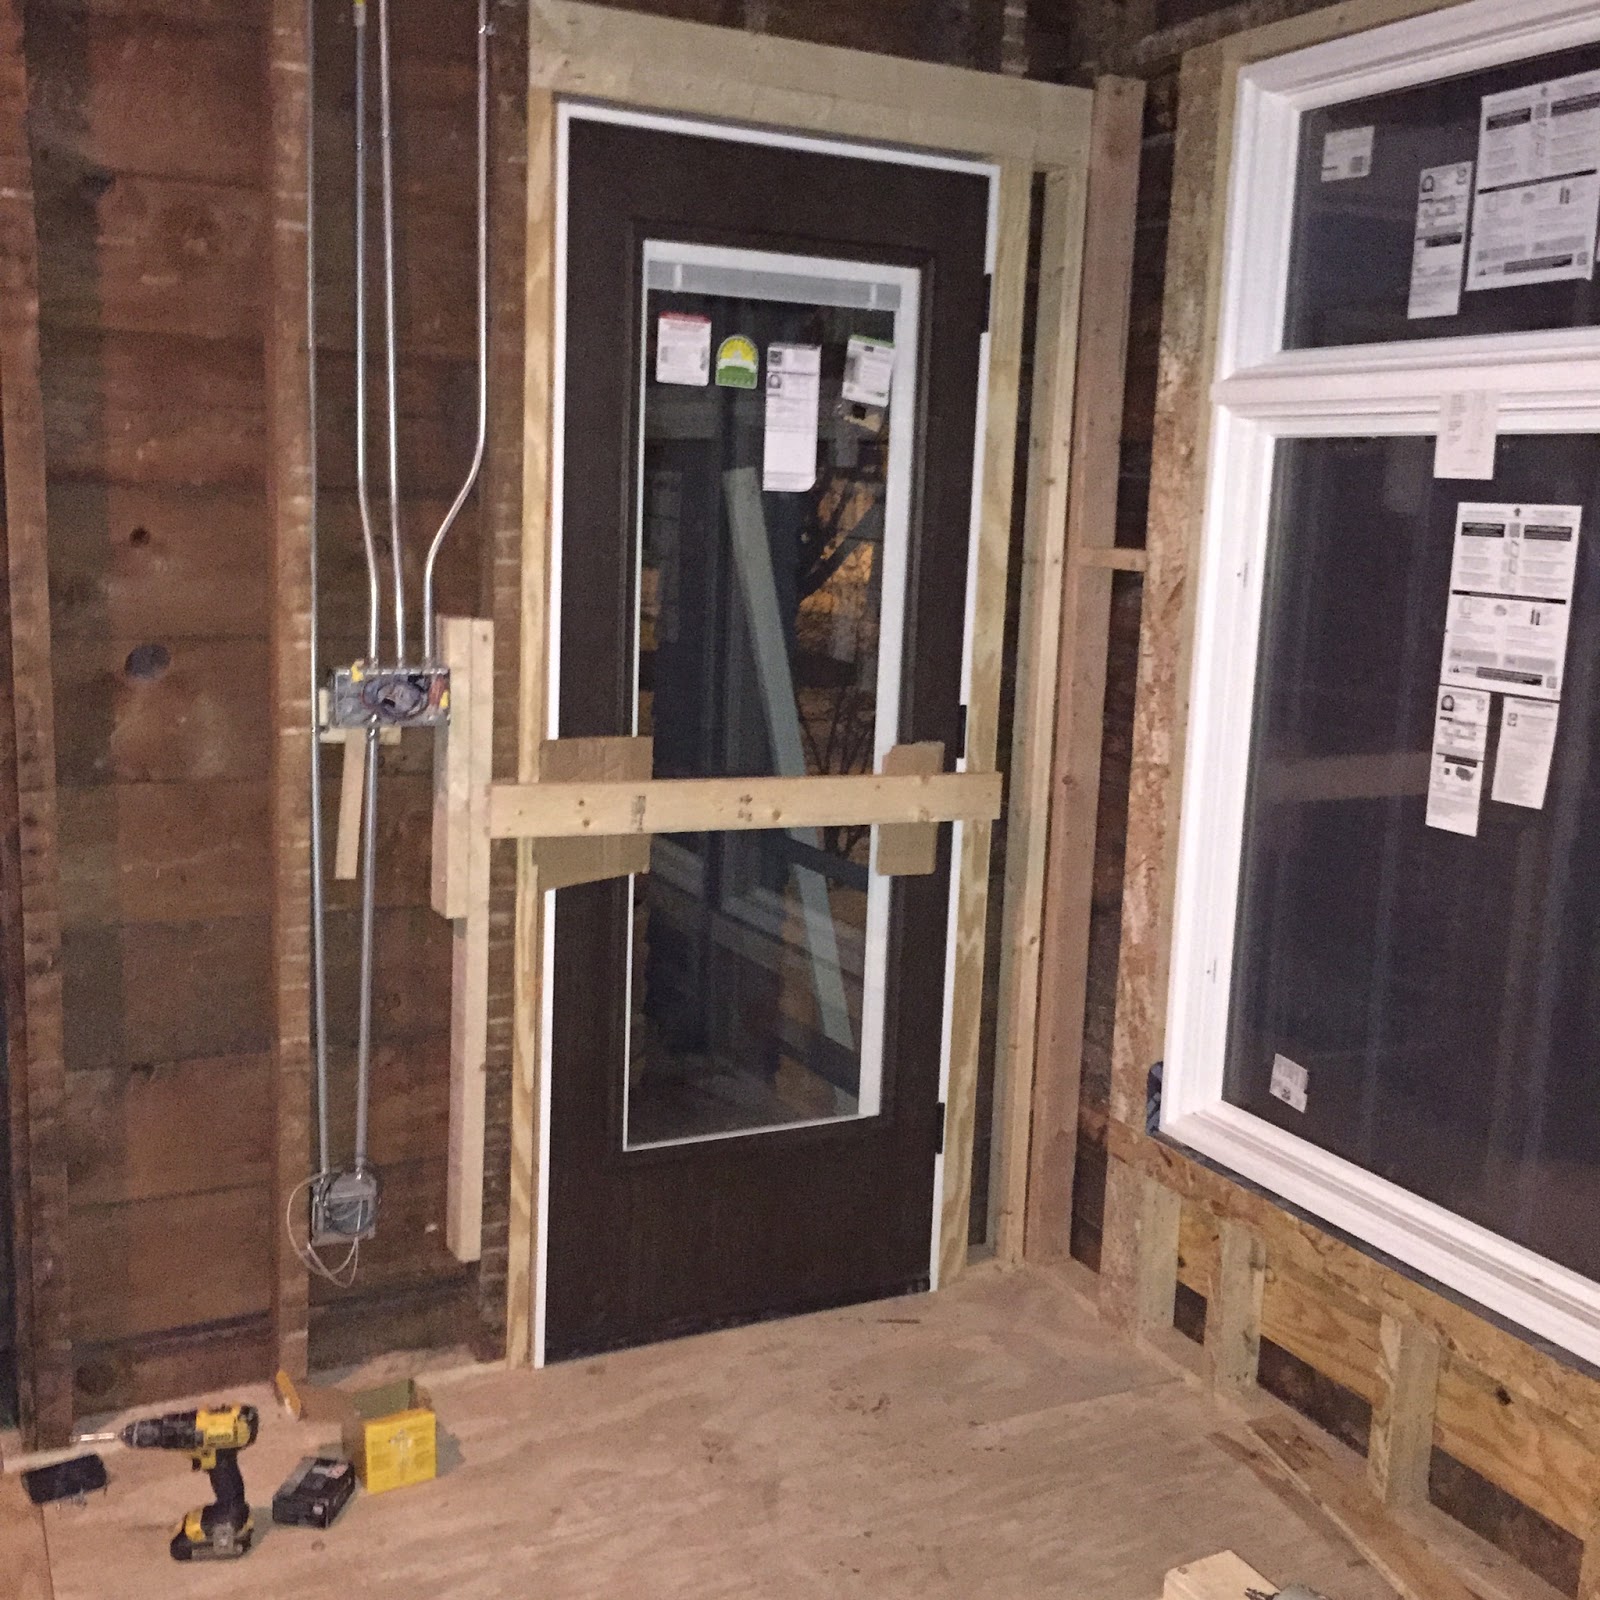
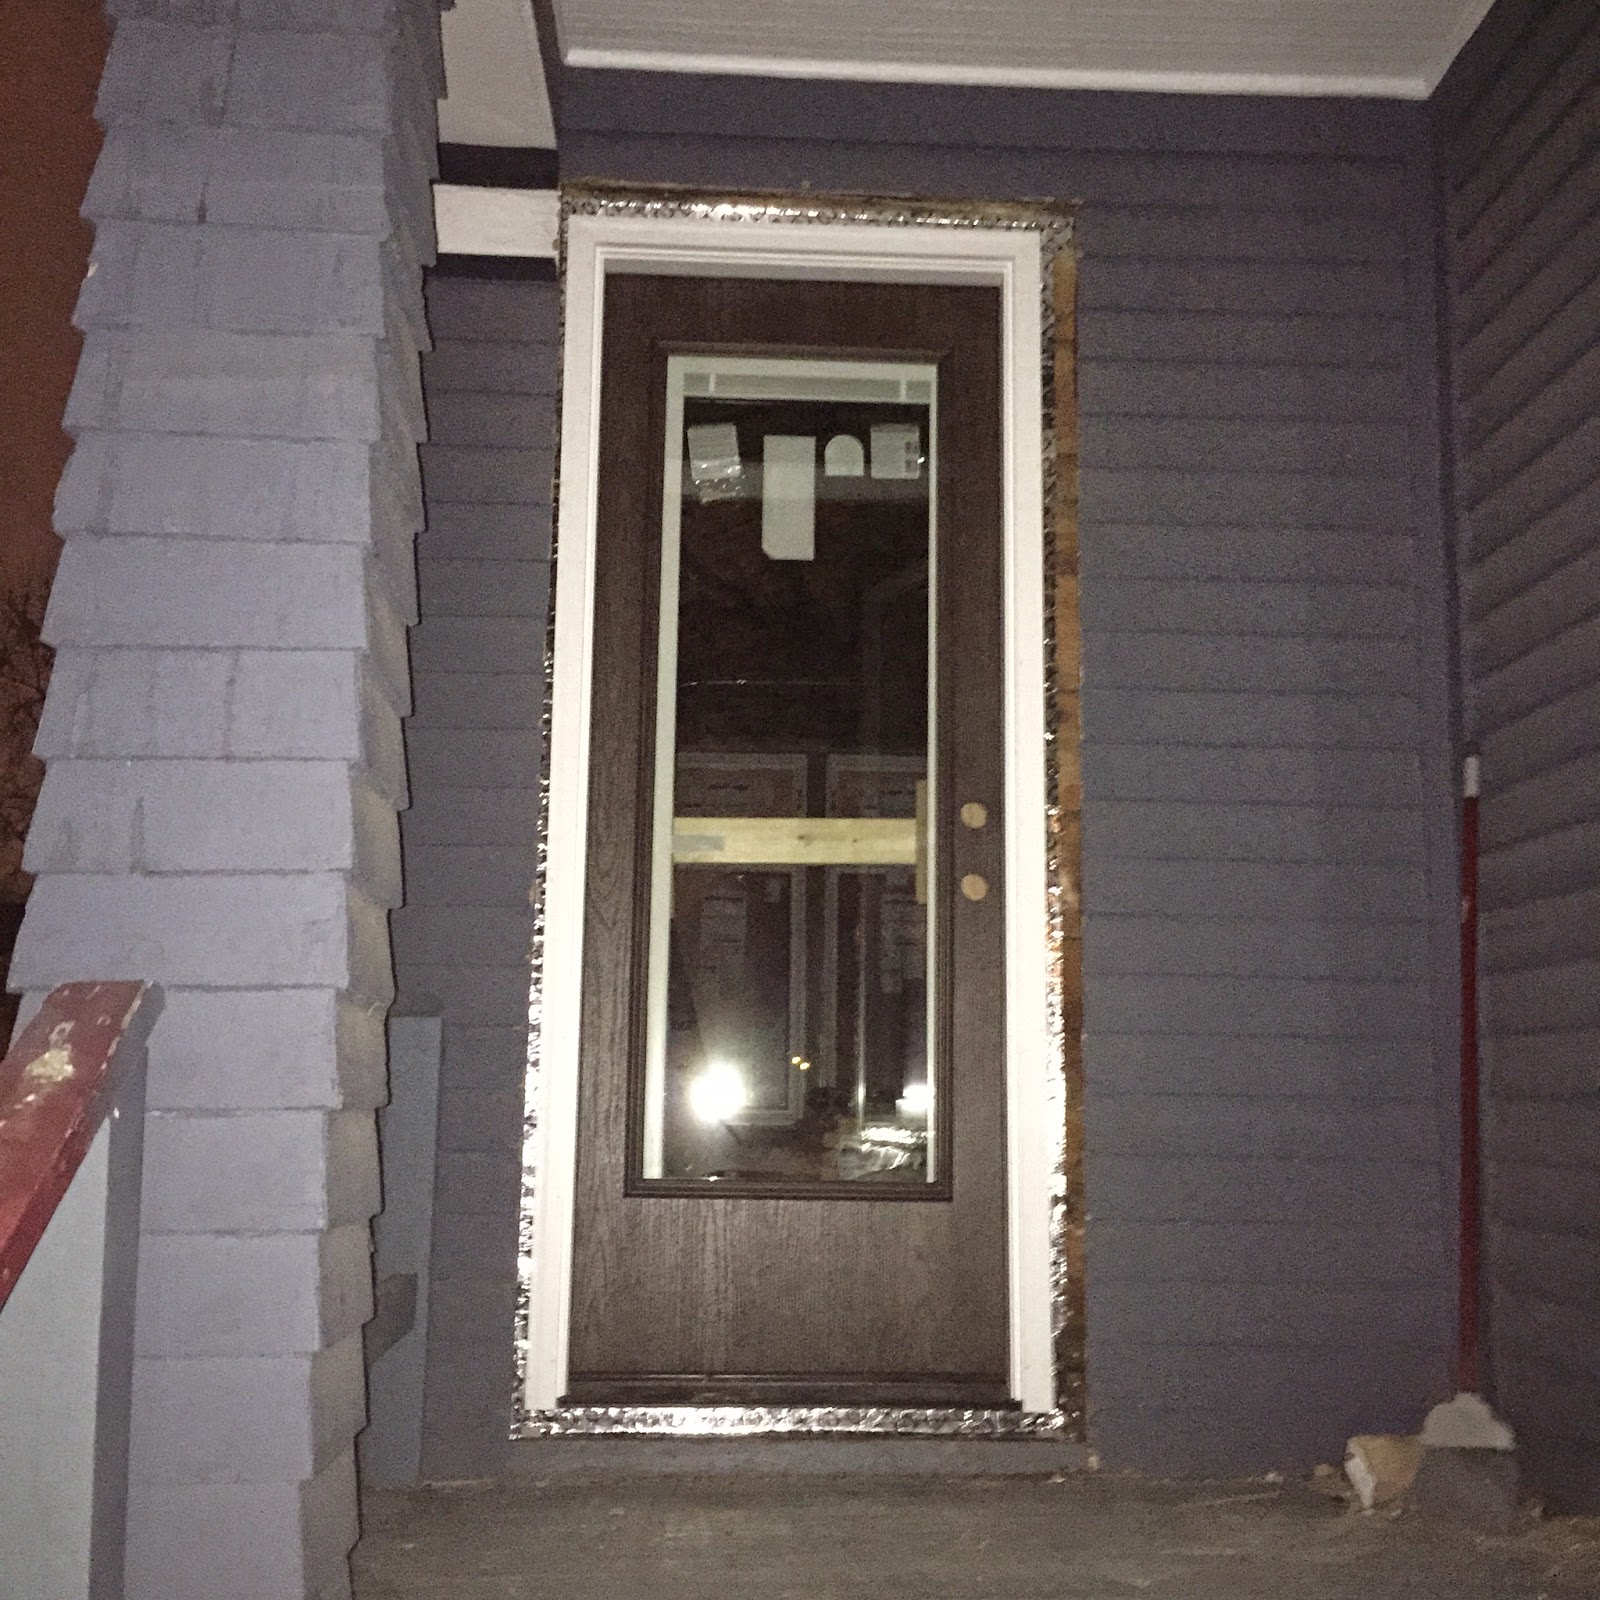
The side door and back door were in pretty bad shape and they weren't original to the home so we decided to get some new ones. This was a pretty tough decision because we initially thought we'd get wood doors since the front door is wood and it goes with the style of the home, but the low maintenance aspect of fiberglass doors made them very appealing. We looked at a bunch of styles and in the end decided to go with fiberglass doors with a large window that have a wood grain finish that make them look more like wood. We selected dark java doors because we want all of the doors in the house to be dark brown. We think it will contrast nicely since we have so much white trim. We'll also be staining the staircase handrails and fireplace mantels the same color to match. Lauren decided to get the internal shade in the door for convenience. We really like them.
New Back Door in Mudroom
Inside view of new side door
Outside view of new side door. You can see we need all new trim and siding. Next phase of work
Thursday, March 5, 2015
Mudroom
Now that the weather has broke we have FINALLY been able to get started on the mudroom addition. This has completely opened up the kitchen and let a lot more light in. The new mudroom is also bigger then the previous mudroom. We also decided to move the location of the back door. It was previously facing west, but is now facing south towards where the deck will eventually go. Contractors built the entire thing in 3 days!
Starting to Frame Mudroom
Huge Concrete Footers, thankful for the few days above freezing
Framed New Mudroom
Inside View of New Mudroom with new door and windows
Looking into the Kitchen and Mudroom
BEFORE
DURING
AFTER (sort of)
Subscribe to:
Comments (Atom)


.jpg)


